
 Growing up the only chocolate chip cookie recipe I knew came on the back of a bag of Toll House morsels. And let’s be honest: that recipe stands the test of time. Simple, no fuss, and tasty. As a kid I’d hang around the kitchen while my brother would stir together a batch with a friend, anxiously waiting to lick the spoon. Back then nobody feared raw egg (even Orange Julius threw it into their smoothies at the mall to get that amazing froth), and the only possible repercussions were sticky fingers or fewer cookies in the end.
Until I hit my 20’s, I was perfectly content with getting my cookie dough fix from a refrigerated tube of Pillsbury. Even though I knew better, salmonella never deterred me (and still doesn’t.) I’m certainly glad there’s no way to go back and count how many times girlfriends and I would devour the whole thing in a night. Never baking it, we would get down to the end and squeeze what remained out of the plastic like it was the dregs of the toothpaste, but so much more delicious. Admittedly, I feel a little ill looking back on that.
 Jump ahead a few years, and my baking obsession kicked into gear full swing. Pre-made dough became a thing of my past, because I learned how quickly I could throw together a batch from ingredients I typically keep at home. I tried recipes from favorite cookbooks (the one in “Best Recipes” from America’s Test Kitchen was my go-to for years,) the classic Neiman Marcus one that went viral long before social media made “like” and “share” buttons, and whatever popped out from my online searches.
But when a friend brought hot from the oven chocolate chip cookies to our book club on a cold night back in 2011, I took one bite and knew there had to be a winning recipe behind it. (Okay, so it wasn’t one bite. It was more like 47 bites because I could not stop eating them!) Deb at Smitten Kitchen had done it again. Her “Chewy Crispy Chocolate Chip Cookies” found its way into my binder of “keepers,” and I haven’t looked back.
That isn’t to say I haven’t played with the recipe, because…well, that’s one of the things I enjoy most in baking. I’ve tried almond extract instead of all vanilla, I’ve replaced chocolate chips with chopped up Andes mints, I’ve done caramel and white chocolate chips topped with Maldon sea salt. But without fail I’ve always browned the butter instead of simply melting it, which adds a deeper, nuttier flavor to every bite. Each time I tried a new version I experimented with cooking times as well, because I’ve always hoped to achieve my ideal consistency: somewhat crispy edges, with an undeniably soft and chewy center. I learned it all comes down to a short bake at a low temperature, and you must make sure the cookies are removed to a cooling rack fairly quickly before they have a chance to harden.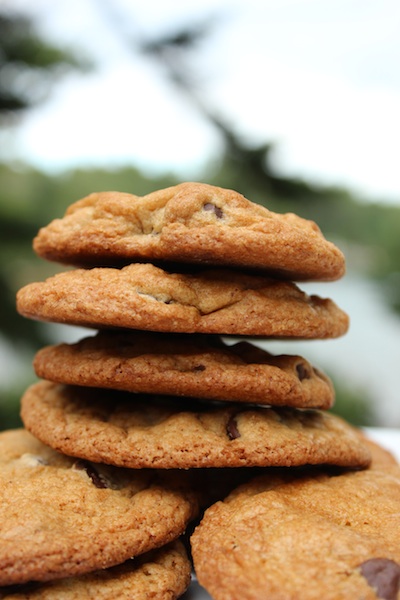
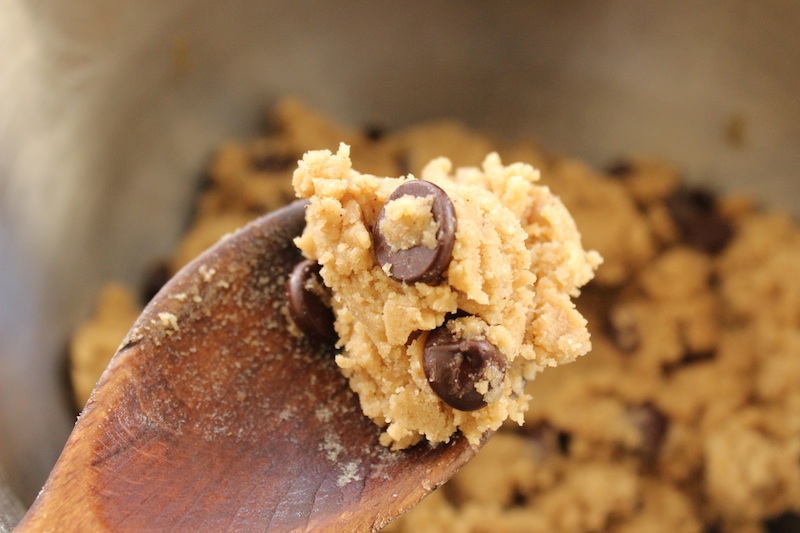
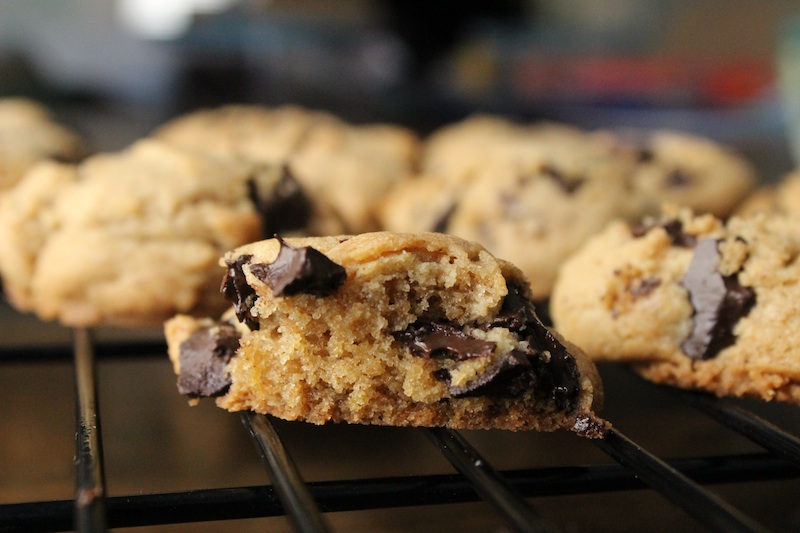
After all my tinkering, I think I’ve finally settled on my perfect chocolate chip cookie. A cookie that when baked may actually surpass the beauty of the raw dough. It has a caramel background that comes from the browned butter, a hearty dose of vanilla, just the right amount of salt so that you notice it, but it doesn’t overpower (defying a current trend, it runs through every bite, not just sprinkled on top,) and the final product crackles along the edges before you sink your teeth into the slightly gooey center. Chunks of chocolate often replace chips, but if I use chips I make sure they’re dark chocolate ones.

How To Brown Your Butter
If you haven’t browned butter before, please don’t be intimidated. It’s really not complicated, and as soon as you do it once, you’re going to be tempted to do it every time you see a recipe that calls for melted butter. In just a few extra seconds a saucepan of regular old butter becomes magical, and the richness the heat brings is worth the effort. Simply cut the butter into chunks (around 2 TBSP each), and let it melt in a small saucepan over medium heat. Once the solids have liquefied, keep a close eye on it and see how it begins to froth. When the foam and bubbles start to dissipate, use a wooden spoon to stir. You’ll notice tiny brown flecks form on the bottom of the pan, and this is when you have to be vigilant. In less than 15 seconds a few dots will turn into a full layer of floating solids. Use your nose, and you will smell a nuttiness that wasn’t there before. Immediately remove the pan from the flame and pour your butter into your mixing bowl. This will cool it off and stop the butter from moving from liquid gold into a burned mess.
Browned Butter Gives This Cookie A Caramel Background

Cookies On Vacation Taste Even Better
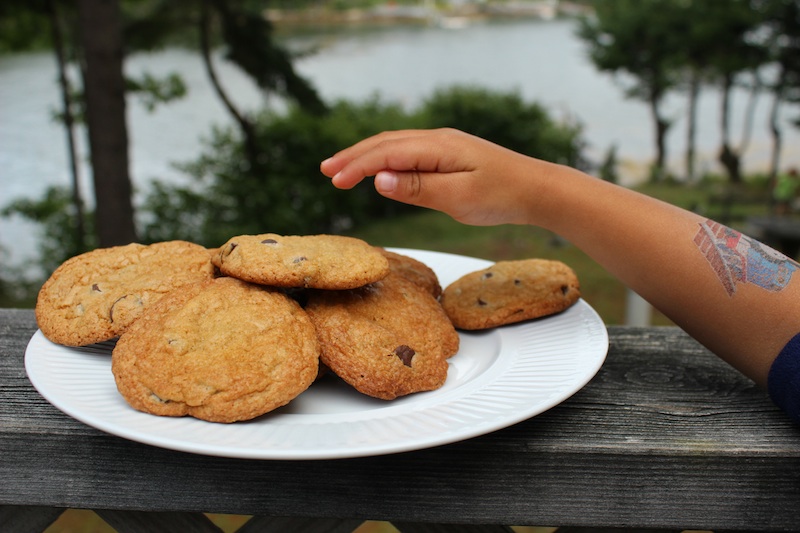
Little Hands Can’t Be Kept Away
I’d love to hear what you think of these, and if you have a favorite cookie recipe please leave it in the comments and I will test it out! Because really, there can never be too many cookies in my life.
These Brown Butter Chocolate Chip Cookies have a hint of caramel that comes from the browned butter, a hearty dose of vanilla, just the right amount of salt, and they crackle along the edges before you sink your teeth into their slightly gooey center. Try not to eat all the dough before they go into the oven, because the baked version is worth the wait.
Ingredients
- 3/4 cups unsalted butter (1.5 sticks)
- 6 tablespoons white sugar (90 grams)
- 1 cup brown sugar (200 grams)
- 1 tablespoon vanilla extract
- 2 large eggs
- 2 cups all purpose flour (260 grams)
- 3/4 teaspoons baking soda
- 1.25 teaspoons kosher salt
- 1.5 - 2 cups dark chocolate chips
Instructions
In a small saucepan, melt and brown your butter over medium heat. (This can take anywhere from 10-20 minutes, so get started with this step right away before doing anything else. If you haven't done this before, instructions are in the notes below.)
While the butter is browning, combine both sugars in a large bowl. You can use a stand mixer, but a regular bowl and wooden spoon are really easy with this recipe.
In a medium size bowl, whisk together the flour, baking soda and salt.
Once the butter has browned, immediately pour the hot butter over your sugars and stir until everything is well combined. Add the vanilla extract to the butter and sugar combo. It will become smooth and creamy looking, and should have cooled slightly. Add the eggs one at a time to this large bowl, stirring quickly so that the eggs don't cook from the heat of the still warm butter.
Slowly add in half of the dry ingredients to the large bowl, stirring to incorporate , and then mix in the rest.
Finally stir in the chocolate chips, using more if you like a very chocolatey cookie.
Chill the dough in the refrigerator for at least 30 minutes (and try not to sneak too many spoonfuls while you wait.)
Preheat the oven to 325 degrees Fahrenheit. (Normally you do this first in a recipe, but wait until you are almost done chilling the dough.)
Line 2 baking sheets with Silpat sheets or parchment paper.
Use a Tablespoon or an ice cream scoop to measure out your cookies, spacing them evenly on the sheets, around 3 inches apart
Bake two sheets at a time, for a total of 11-12 minutes. Set your timer for 8 minutes, and make sure to switch the sheets from high to low and back to front, so that they cook evenly, and then add on 3 more minutes. When they begin to brown they are done, so remove them quickly to wire racks to cool. You will probably have one more tray of cookies to bake, or simply eat the rest with a spoon.
Notes
*This recipe is adapted from a favorite on Smitten Kitchen.
**Browning butter can take between 10-20 minutes, depending on your heat source, so get started with this step first, and do everything else while you wait. Simply cut the butter into chunks (around 2 TBSP each), and let it melt in a small saucepan over medium heat. Once the solids have liquefied, keep a close eye on it and see how it begins to froth. When the foam and bubbles start to dissipate, use a wooden spoon to stir. You'll notice tiny brown flecks form on the bottom of the pan, and this is when you have to be vigilant. In less than 15 seconds a few dots will turn into a full layer of floating solids. Use your nose, and you will smell a nuttiness that wasn't there before. Immediately remove the pan from the flame and pour your butter into your mixing bowl.
***Chilling the dough helps make sure that the cookies don't spread out too flat when they cook, and just makes everything come together better. I've rushed it and skipped the time in the fridge, but it always turns out better if I wait. But if you're in a hurry, they will certainly still be delicious.
Aw man… chocolate chip cookies! O_O I wish I had those right now…
I owe you another batch, my friend! And this recipe is even better than the ones I made you last time.
Thanks for adding the Google+ link 🙂
Kel Kel
Thanks for the reminder, Kel!
Why in the world have I never browned the butter first!!! Also have to admit I’ve never chilled the batter. Too impatient usually. Will see if we can have enough restraint next time to do it.
Amanda, once you start browning the butter, I promise you will start doing it on everything! Brownies, blondies, you name it! (And yes, I will posting recipes for those too!) Trying chilling the batter at least once and see if you notice the difference. At least throw it in the freezer for 20 minutes if you’re impatient, and in the meantime do the dishes. The time will fly by, and we all know frozen cookie dough is amazing.
I can’t wait to try this, in terms of cooking, cookies are my passion! The first and only time I tried brown butter, I burnt it. Reading your instructions really helped me see where I went wrong. Thanks! And thanks to Kellie you got a new follower here!
Hi Terri, I’m so glad you found the instructions helpful, and I hope that you report back when you try the cookies! Thanks for following!
I reduced the amount of salt as it seemed a lot and will reduce again as found them still a little salty in the aftertaste. They were still a terrific hit though! Up the top with the chocolate cake.
Will do more with brown butter now.
Hi Lorna, I’m so happy to hear that they were a hit and that browning butter is something you’ll do again. I’ve always been a fan of salty cookies, but know that not everyone else is. I love that you are changing them to fit your taste, because that’s the fun part of playing in the kitchen! Thanks so much for writing!
Aloha K and T.O. readers –
As usual, K, so proud of you!
Below are two recipe notes and two musings from the brother who makes an unnamed cameo at the beginning of this recipe, and who has been working on the “perfect” chocolate chip cookie for a just a little longer than, and perhaps not as successfully as, Karen.
1. Browning butter is unquestionably decadent and a step in a direction that is, for some, a point of no return. Do NOT blame Karen for the outcome of this revelation and its application in other recipes. It is your own fault for reading this prodigiously gorgeous weblog. However, I have found, in countless batches of browned-butter chocolate-chip cookies, that taking the extra step of cooling, yes – cooling, the golden sunshine of browned butter helps to prevent cooking the eggs, natch, as well as melting your sugars (which IMHO changes the flavor and texture and possibly the space-time continuum).
2. Karen – whose culinary savvy leads you down life-changing paths (cf. “Brown Butter,” above) – has introduced you to the absolutely important chilling stage. However, the longer you can resist the No-I’m-not-eating-before-baking-honey-I’m-just-spooning-this-manna-from-heaven-into-my-mouth-to-test-for-poison denial syndrome, the better. While K advocates a 30-minute busy-mom-schedule interlude, I’ve found a 12-to-24-hour pause (in an airtight container) is better for your waistline as well as the flavor. And, after a day, flavor doesn’t meld more, AFAICT.
Now, two musings:
3. How does the chemisty of baking soda affect lift in a finished cookie? Greatly. Are eggs important in binding all bakery treats? Absolutely. But guess what spooners. Yes, you know who you are (cf. “Test-for-Poison” and “Denial,” as well as “Kellie,” above). They DO NOT need to be in your cookie crudo. Yep – skip the soda and the eggs and you and you can eat the whole bowl, worry free. Flavor identical, no chilling needed. And this is where NOT chilling the browned butter is a treat. Yup, melted sugar makes for smoooooth – Billy Dee Williams smooth – spooning. (Sure, chill for richer, bolder flavor, but… caveat: more than two boules at any stage will cause you to immediately clean the entire kitchen while singing “C is for Cookie” in a sugar rush and then be struck with advanced, kitten-level narcolepsy.)
4. Finally, feel free to imitate that unnamable goo in the blue plastic tube that K remembers so fondly. I line up my homemade dough on some Stretch-Tite, roll it into a log, and then slice it up when chilled firm. No muss, no fuss.
With love…
A
Oh, And, you crack me up! Thanks for the response, and the suggestions. 🙂 It’s true, pouring hot browned butter into the sugars right away does change the flavor, and personally I think that is a great thing. That’s where the caramel notes in this cookie come from, and I probably should have mentioned that in the post. But you’re right, you have to be careful to stir long enough so that the eggs don’t cook in that warm buttery sugar mix. If you let it sit for a minute or two before adding the eggs in VERY slowly, you should be safe though. And chilling 30 minutes is for those in a rush, but an hour or two is ideal. Any longer the dough may actually get a little hard (not a bad thing,) and be more difficult to spoon out. I love the tip too of skipping the eggs and baking soda for the safer raw dough experience. And for the freeze and slice cookie approach, I have a great Mexican Hot Chocolate Cookie recipe that does the same thing. Pure heaven.
I’ve just taken the first pan of these out of the oven and begun taste testing. Thanks for sharing the secret to how to get a hint of toffee in a chocolate chip cookie! Awesome!
Audrey, I’m so you glad made them!I hope you enjoyed the rest of the batch, and thanks for writing!
I just tried your recipe last night for these. I do not need any other chocolate chip recipe ever again. I had been using browned butter but following the serious eats recipe which was much more labor intensive for a less desirable texture. These cookies are crispy AND chewy…the best of both worlds. I knew your recipe would be amazing and I was right. Thank you for posting this!!!
These cookies are incredible!! Thank you! I had never browned butter before, but it was super easy. I ended up kind of underbaking them, I think because the dough chilled in the freezer for 6 hours or so. But that was totally fine with me because I like a soft cookie over a really crisp cookie. They came out great. I still have some of the dough in the freezer–how long do you think it will last in there?
I am so glad you made them! I have frozen the dough already shaped into little balls,and they keep for months. (As long as you don’t repeatedly sneak to your freezer every night to grab a couple to eat straight up as dough. I’m just saying… It’s not like I’ve ever done that or anything.) But conservatively, dough frozen as balls or in logs should keep at least 4 months if wrapped or sealed tightly in an airtight bag or container. But honestly, I’ve been known to keep things up to a year and find they’re still fine once I’ve dug them out of the depths of my monstrous freezer. So feel free to freeze away!
These are so amazing, Karen. I don’t think I let the butter brown quite enough (I was too nervous) but I can still taste a difference. And the salt in the batter is exactly what it needed to offset all the sweet. Just marvelous, friend!! Brava!